Customization
Termia's look is controlled from one place: the Appearance tab of Settings. Open it from
the File menu (File > Settings) or by clicking your avatar in the tab bar, then choose
Appearance in the left rail. Inside, a "Quick Style" panel groups four things: the overall
color theme, the terminal font, interface transparency/blur, and a per-tab background image.
Light, dark, and system appearance
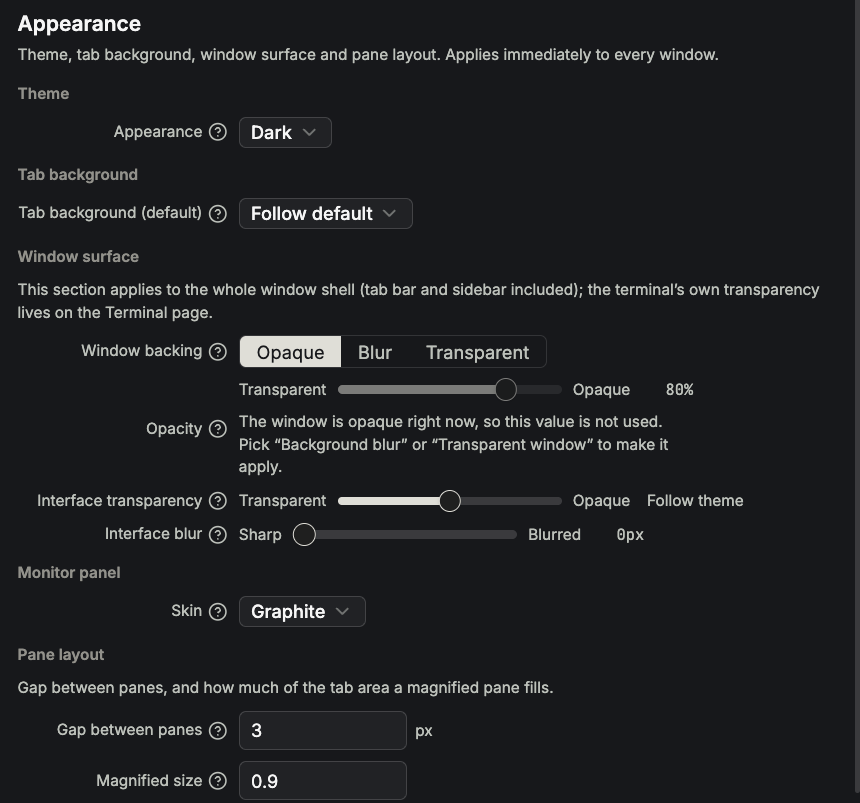
At the top of the Appearance tab, three buttons switch the app's overall appearance: System,
Light, Dark. This writes the termia:theme setting ("system", "light", or "dark",
default "dark"). In "system" mode Termia follows the OS prefers-color-scheme media query
and updates live if you change your OS setting while the app is open.
The whole UI ships two token sets — one for light, one for dark — defined in
frontend/app/theme.scss under the .dark and .light scopes. Every built-in surface (tab bar,
side rail, dialogs, terminal chrome) is themed from these tokens, so switching modes never leaves
part of the interface unreadable. If you build custom UI, this repo's convention is to always
define a color as a token in both scopes, not as a fixed hex value.
Switching modes also restores whichever color theme (below) you last used in that mode: Termia remembers your last light-mode pick and your last dark-mode pick separately, so flipping from dark to light and back returns you to where you were, not to the default.
Color theme (tab background + terminal palette)
The Color Theme section shows a grid of preset cards. Each card is a small preview: a strip that shows the tab background, a bar below it colored with the terminal's background/foreground, and a row of eight swatches for the terminal's ANSI palette. Clicking a card applies both halves at once — the tab background preset and a matching terminal color theme — so the two never clash. Cards are filtered to the app mode you're currently in: light-mode cards only appear in light mode, and vice versa (the "Default" card has no mode restriction and appears in both).
Under the hood, choosing a card sets two independent config keys in one action:
tab:preset— which tab-background preset to use (see Presets for what a preset is and where these live)term:theme— which terminal color theme to use (frompkg/wconfig/defaultconfig/termthemes.json, 20 themes ship by default: 14 dark, 6 light)
Applying a theme from this grid updates every open tab in the current workspace immediately, unless a tab has its own background image override (see below), in which case only that tab's accent-border color is refreshed and its custom background is left alone.
Terminal font and size
The Terminal section has two dropdowns that set the default font size (term:fontsize) and
font family (term:fontfamily) for every terminal that hasn't been overridden individually. Font
size options run from 10px to 24px. The font family list is fixed to fonts this app knows are
monospace and safe to fall back from:
Consolas, JetBrains Mono, Fira Code, Cascadia Code, Source Code Pro, IBM Plex Mono,
Roboto Mono, Inconsolata, Ubuntu Mono, Hack
The actual default depends on your OS: Windows defaults to Consolas; macOS and Linux default to
JetBrains Mono (bundled with the app, so it always renders even if not separately installed).
Whatever you pick from the fallback stack above is expected to already be installed on your
system for other platforms.
Per-terminal overrides
Right-click the header of any terminal block for a context menu with its own Themes, Font
Size, Font Family, and Transparency submenus. Anything you pick here overrides the
global default for that one block only (stored as term:theme / term:fontsize /
term:fontfamily / term:transparency in the block's own metadata); each submenu's first entry
is always "Default" and clears the override, falling back to the global setting again. The
Themes submenu groups all 20 shipped themes under "Dark Themes" and "Light Themes" headers so
you can find one that matches your current app mode. Transparency here is a fixed set of
steps — 0%, 25%, 50%, 75%, 100% — independent from the interface transparency slider
described next.
Interface transparency and blur
The Interface Effects section has two sliders:
- Interface Transparency (0–90%) — applied globally to blocks, tabs, and the side toolbars
(
style:transparency) - Background Blur (0–24px) — blurs whatever shows through that transparency
(
style:backgroundblurpx)
The default transparency depends on context: 90% in dark mode, and either 50% or 45% in light mode depending on whether the current tab has a custom background image. The Reset button clears both keys back to those adaptive defaults rather than to a single fixed number, so resetting behaves correctly whichever mode and tab you're in.
Tab background image
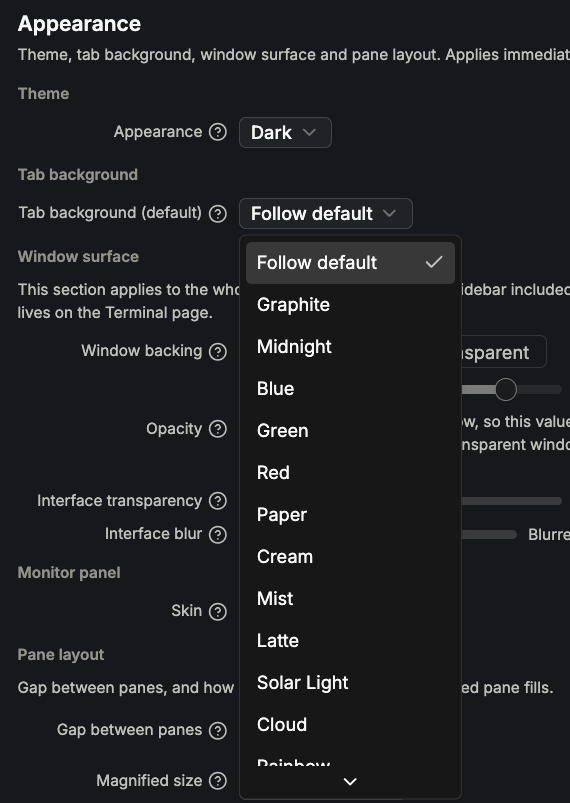
The bottom section lets you set an image background scoped to the current tab only. Drag an image onto the drop zone, or click it to open a file picker (accepts PNG, JPG, JPEG, WebP, GIF, BMP, SVG). Once set, two dropdowns become active:
- Fill Mode —
Cover,Contain,Fill,Repeat - Blend Mode —
Normal,Overlay,Multiply,Screen,Darken,Lighten,Soft Light
The default blend mode is Multiply in dark mode and Normal in light mode, so a photo doesn't
wash out the dark UI or go muddy on a light one. A tab with an image override keeps that image
when you switch color themes; only the color theme's border accent updates around it. Click the
small close button that appears over the preview thumbnail to clear the image and return the tab
to the theme's own background.
Command line: wsh setbg
The same per-tab background can be set from a terminal with wsh setbg, without opening
Settings:
# Set an image background (defaults to center/cover, 50% opacity)
wsh setbg ~/pictures/background.jpg

# Set a solid color background (quote hex values so # isn't read as a shell comment)
wsh setbg "#1a1a2e"
wsh setbg forestgreen

# Positioning
wsh setbg --tile ~/pictures/texture.png                 # repeat
wsh setbg --center --size 200px ~/pictures/logo.png     # centered, unscaled unless --size given

# Opacity only (leaves the current image/color as-is)
wsh setbg --opacity 0.7

# Remove the background
wsh setbg --clear

# Preview the metadata this would apply, without applying it
wsh setbg --print ~/pictures/background.jpg
wsh setbg writes the tab's bg / bg:opacity metadata directly; it is a separate code path
from the Fill Mode/Blend Mode picker above (which composes bgimg:* keys into bg for you), so
mixing the two on the same tab is not recommended. See wsh Reference for
the full command surface.
Language
Termia's UI ships in four languages. Open Settings and choose Language in the left rail; each option is shown in its own language, not translated into whatever language is currently active:
- English
- 中文 (Chinese)
- Español (Spanish)
- 日本語 (Japanese)
Termia detects your OS/browser language on first launch and remembers your choice afterward
(stored locally, per device). Selecting a language takes effect immediately, with no restart.
Region-tagged locales (for example a system reporting zh-TW or es-MX) resolve to the closest
shipped language automatically.
Monitor panes adapt automatically to full, vertical and horizontal layouts; the terminal bottom strip keeps readings live when minimized. See Monitoring for the illustrated modes and monitor skins.